
The above video shows the next version of the mask rotation and tilting mechanism fully operational. I moved the linkages to the outside of the U-shaped rotation mechanism. The U-shaped rotation part is connected to a big internal tooth gear inside the base (basically the diameter of the base). the TT motor drives this big gear with smallest pinion gear possible so to show the entire mechanism down further. In the video I am running the motor at 3.3V, but I can slow it down a bit by running at 2V and it still operates.
With each full rotation the single tooth gear fixed to the base moves its mating fully toothed gear by 3 teeth, which through the reciprocating mechanism, tilts mask tilts up or down about ~10-30 degrees depending on the mask position. The fully toothed gear has 20 positions, but as we are moving an odd amount of teeth each time, we skip around in tilt angle positions, but we do reach all of the angle positions, thought not in order, which probably is good to jump around.

To hold the masks in place to the tilt mechanism, I did not want to have to physically attach to the masks themselves as that would block some of the filter area, even if only a little bit. So instead we attach a small amount of the straps to the tilt mechanism. The above image shows two part magnetic clip that clamps the mask straps in place. Both parts are toothed so the straps can be gripped, and each half has embedded magnets with enough force to hold everything in place but easy enough to pull apart. You just have to take care to make sure the straps are at least semi-taught so the mask correctly moves with the change in tilt angle.
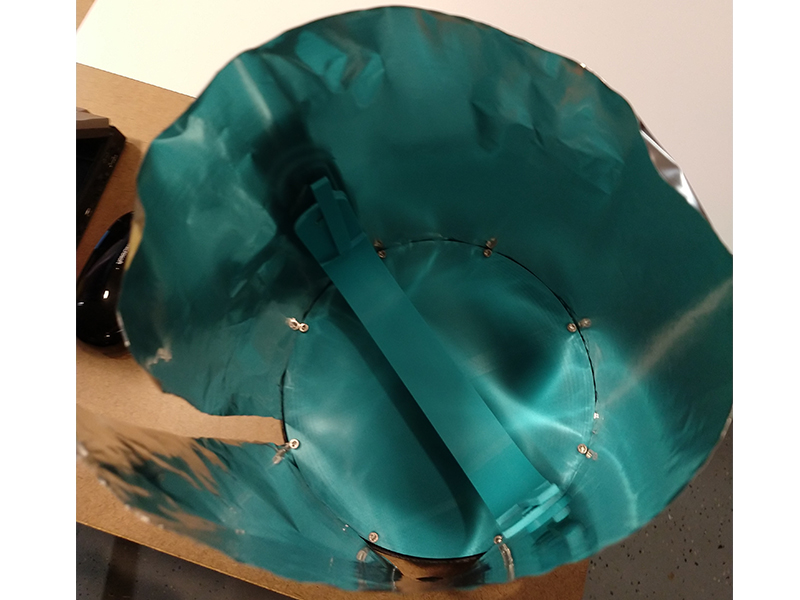
All along the outside edge of the black base, between the large round teal part, there is actually a small gap so a flat plastic sheet material (~0.5mm) can be inserted to form the walls of the chamber. This will take much less time to produce and be will lower cost compared with printing all of the chamber walls. I also can sandwich in aluminum foil so the UV-C rays can reflect all over the chamber too. Image above shows me quickly mocking the up to see and i looks like it will work out quite well.

For the next iteration of the design, I will need to add where the aquarium UV-C bulb will mount. This will be just outside the the turn radius of the mask rotation mechanism so we get it as close to the mask surface as possible. Since the bulb is basically just a quartz tube, it will just sit in a circular pocket in the top of the base. But I will also make the shape of the base around the bulb, and thus the chamber plastic sheet walls/aluminum reflector, to form an elliptical reflector so I can try and focus more of the bulb energy directly to the mask. See the diagram above for the difference between ray paths for elliptical and parabolic reflectors.

